What is S-Cinetone, and How Do You Use It?

Article Categories
This article is intended for users of the Sony FX3, Alpha 1, and Alpha 7S III cameras.
S-Cinetone has been a crucial feature for videography ever since it was first introduced in the Sony FX9. It is now accessible in cameras including the FX3, Alpha 1 and Alpha 7, not to mention the well-received Alpha 7S III. That begs the question: What is S-Cinetone, and how do you properly utilise it to film?
What is the big deal with S-Cinetone?

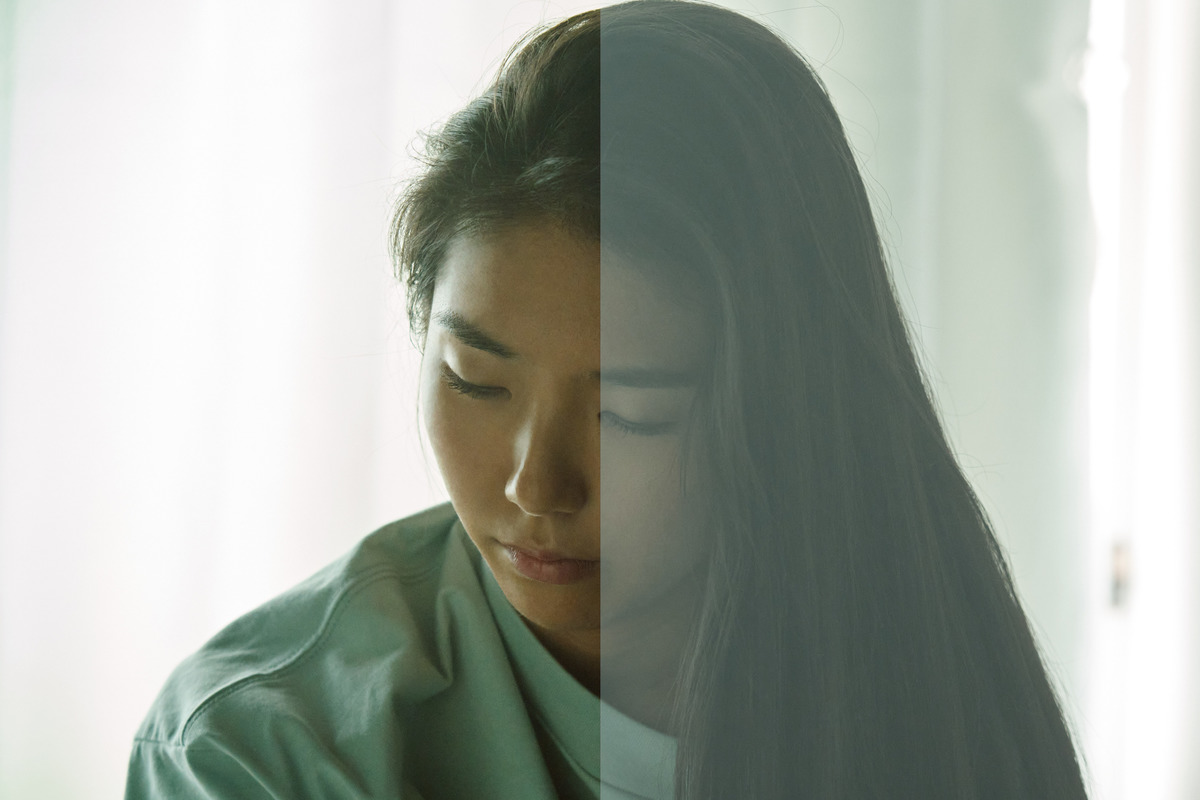
S-Cinetone is a picture profile built to resemble the Sony VENICE’s celebrated cinematic look renowned for optimising skin tones and providing a film-like colour to your videos. While this look is designed explicitly for the VENICE, Sony wanted to bring a version of those cinematic colours to the other camera lineups by introducing the S-Cinetone profile- a cinematic profile intended for digital videos. What’s unique about this profile is that it’s been developed to quickly and effortlessly produce richer content directly from the camera without the need to conduct post-production colour-grading.
How is it different from S-Log3?
In terms of dynamic range, S-Log3 currently offers a range of up to about 15+ stops of light, providing you more control when performing colour-grading. However, it can be challenging for beginner filmmakers to shoot and edit on. Although the dynamic range of S-Cinetone is lower than that of S-Log3, the balance between the dynamic range and the noise level is optimal for high quality video images. Moreover, you’ll be getting the advantage of not needing to go through the colour-grading process. Delivering a faster and more efficacious experience, the S-Cinetone is perfect for beginners and those who are working on tight deadlines. Another comparable thing is that S-Cinetone has a lower base ISO than S-Log3, making it more workable during daylight or bright conditions.
How do you use S-Cinetone?
Now, let’s get into the technical stuff. To use S-Cinetone on the Alpha 1, Alpha 7S III and FX3, start navigating to your camera’s Picture Profile menu and scroll down until you find Picture Profile 11 (PP11). If you have the Alpha 7S III and don’t see PP11, you’ll need a firmware update on your camera. Once you have selected PP11 and found its default settings, check that both Gamma and Colour Mode state “S-Cinetone”.
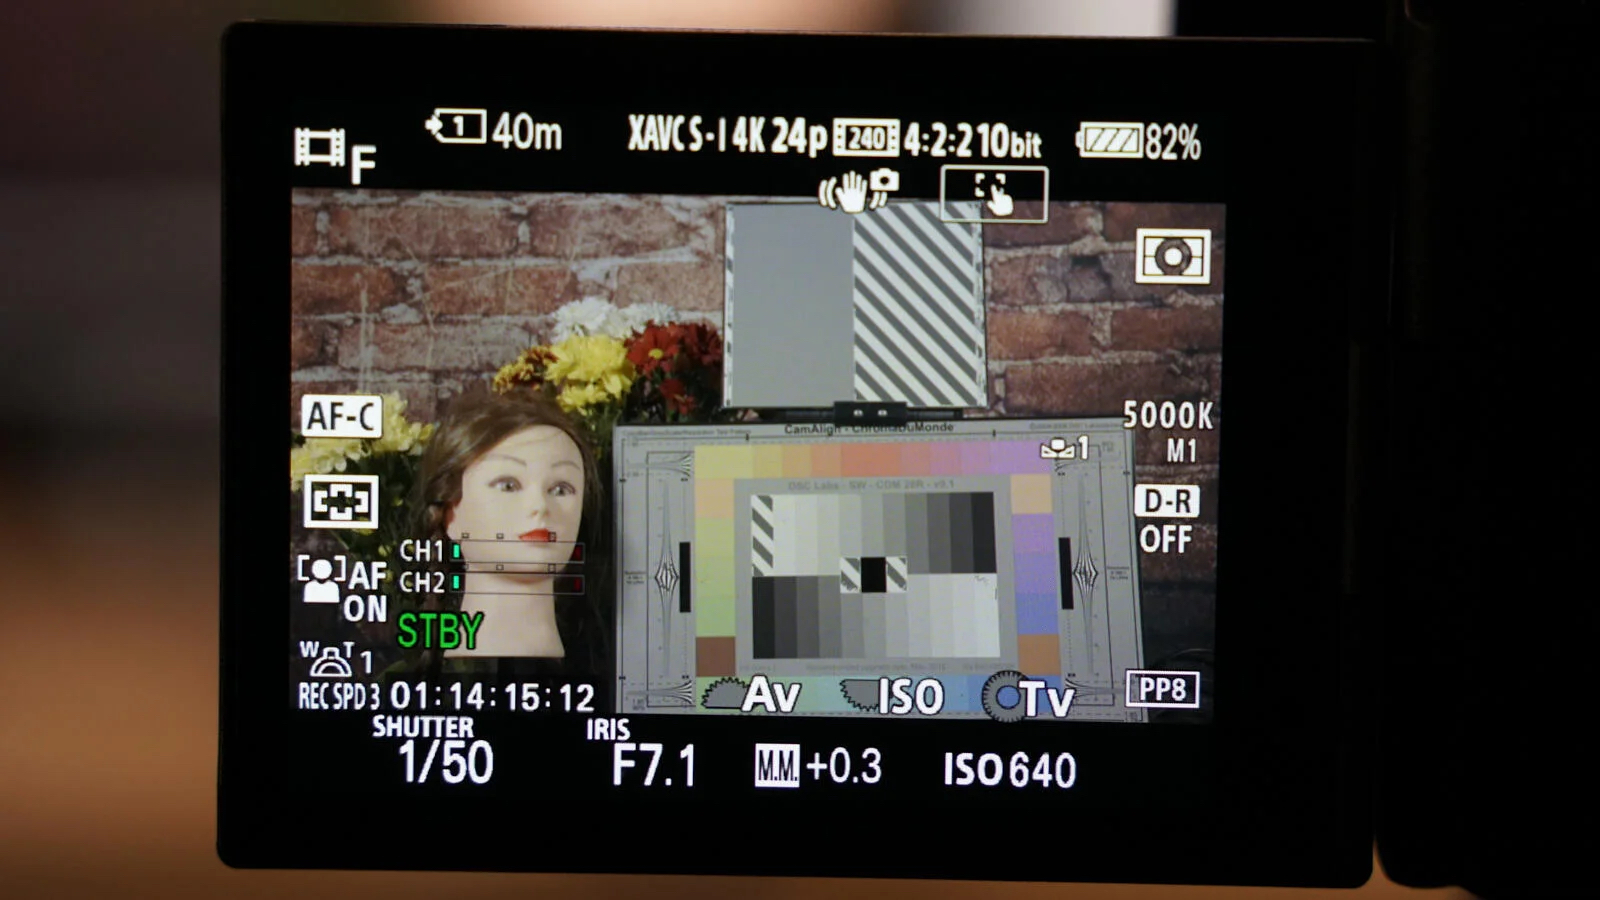
Next, you’ll need to get your exposure right on S-Cinetone to avoid noise in your footage. Set the exposure setting to "Manual" on your Alpha 1, Alpha 7S III, or FX3 camera. Then, you’ll see the letters “MM”, short for Metered Manual, at the bottom of your camera screen, which indicates the brightness of the footage you’re recording. You’ll also see a decimal number next to MM, ranging anywhere from -2.0 to +2.0. Using the meter in your camera, try getting the numbers +/- 0.0, which is ideal for the S-Cinetone profile as it gives just the right amount of brightness to your shot.
In short, S-Cinetone offers you a quick and efficient solution to your colour-grading woes, as we know that it can be the bane of almost every filmmaker’s existence. Nevertheless, some prefer more control over their shots and are more inclined to shoot in Log profile. Ultimately, it is still up to the individual as to what they are looking for in their creative process.